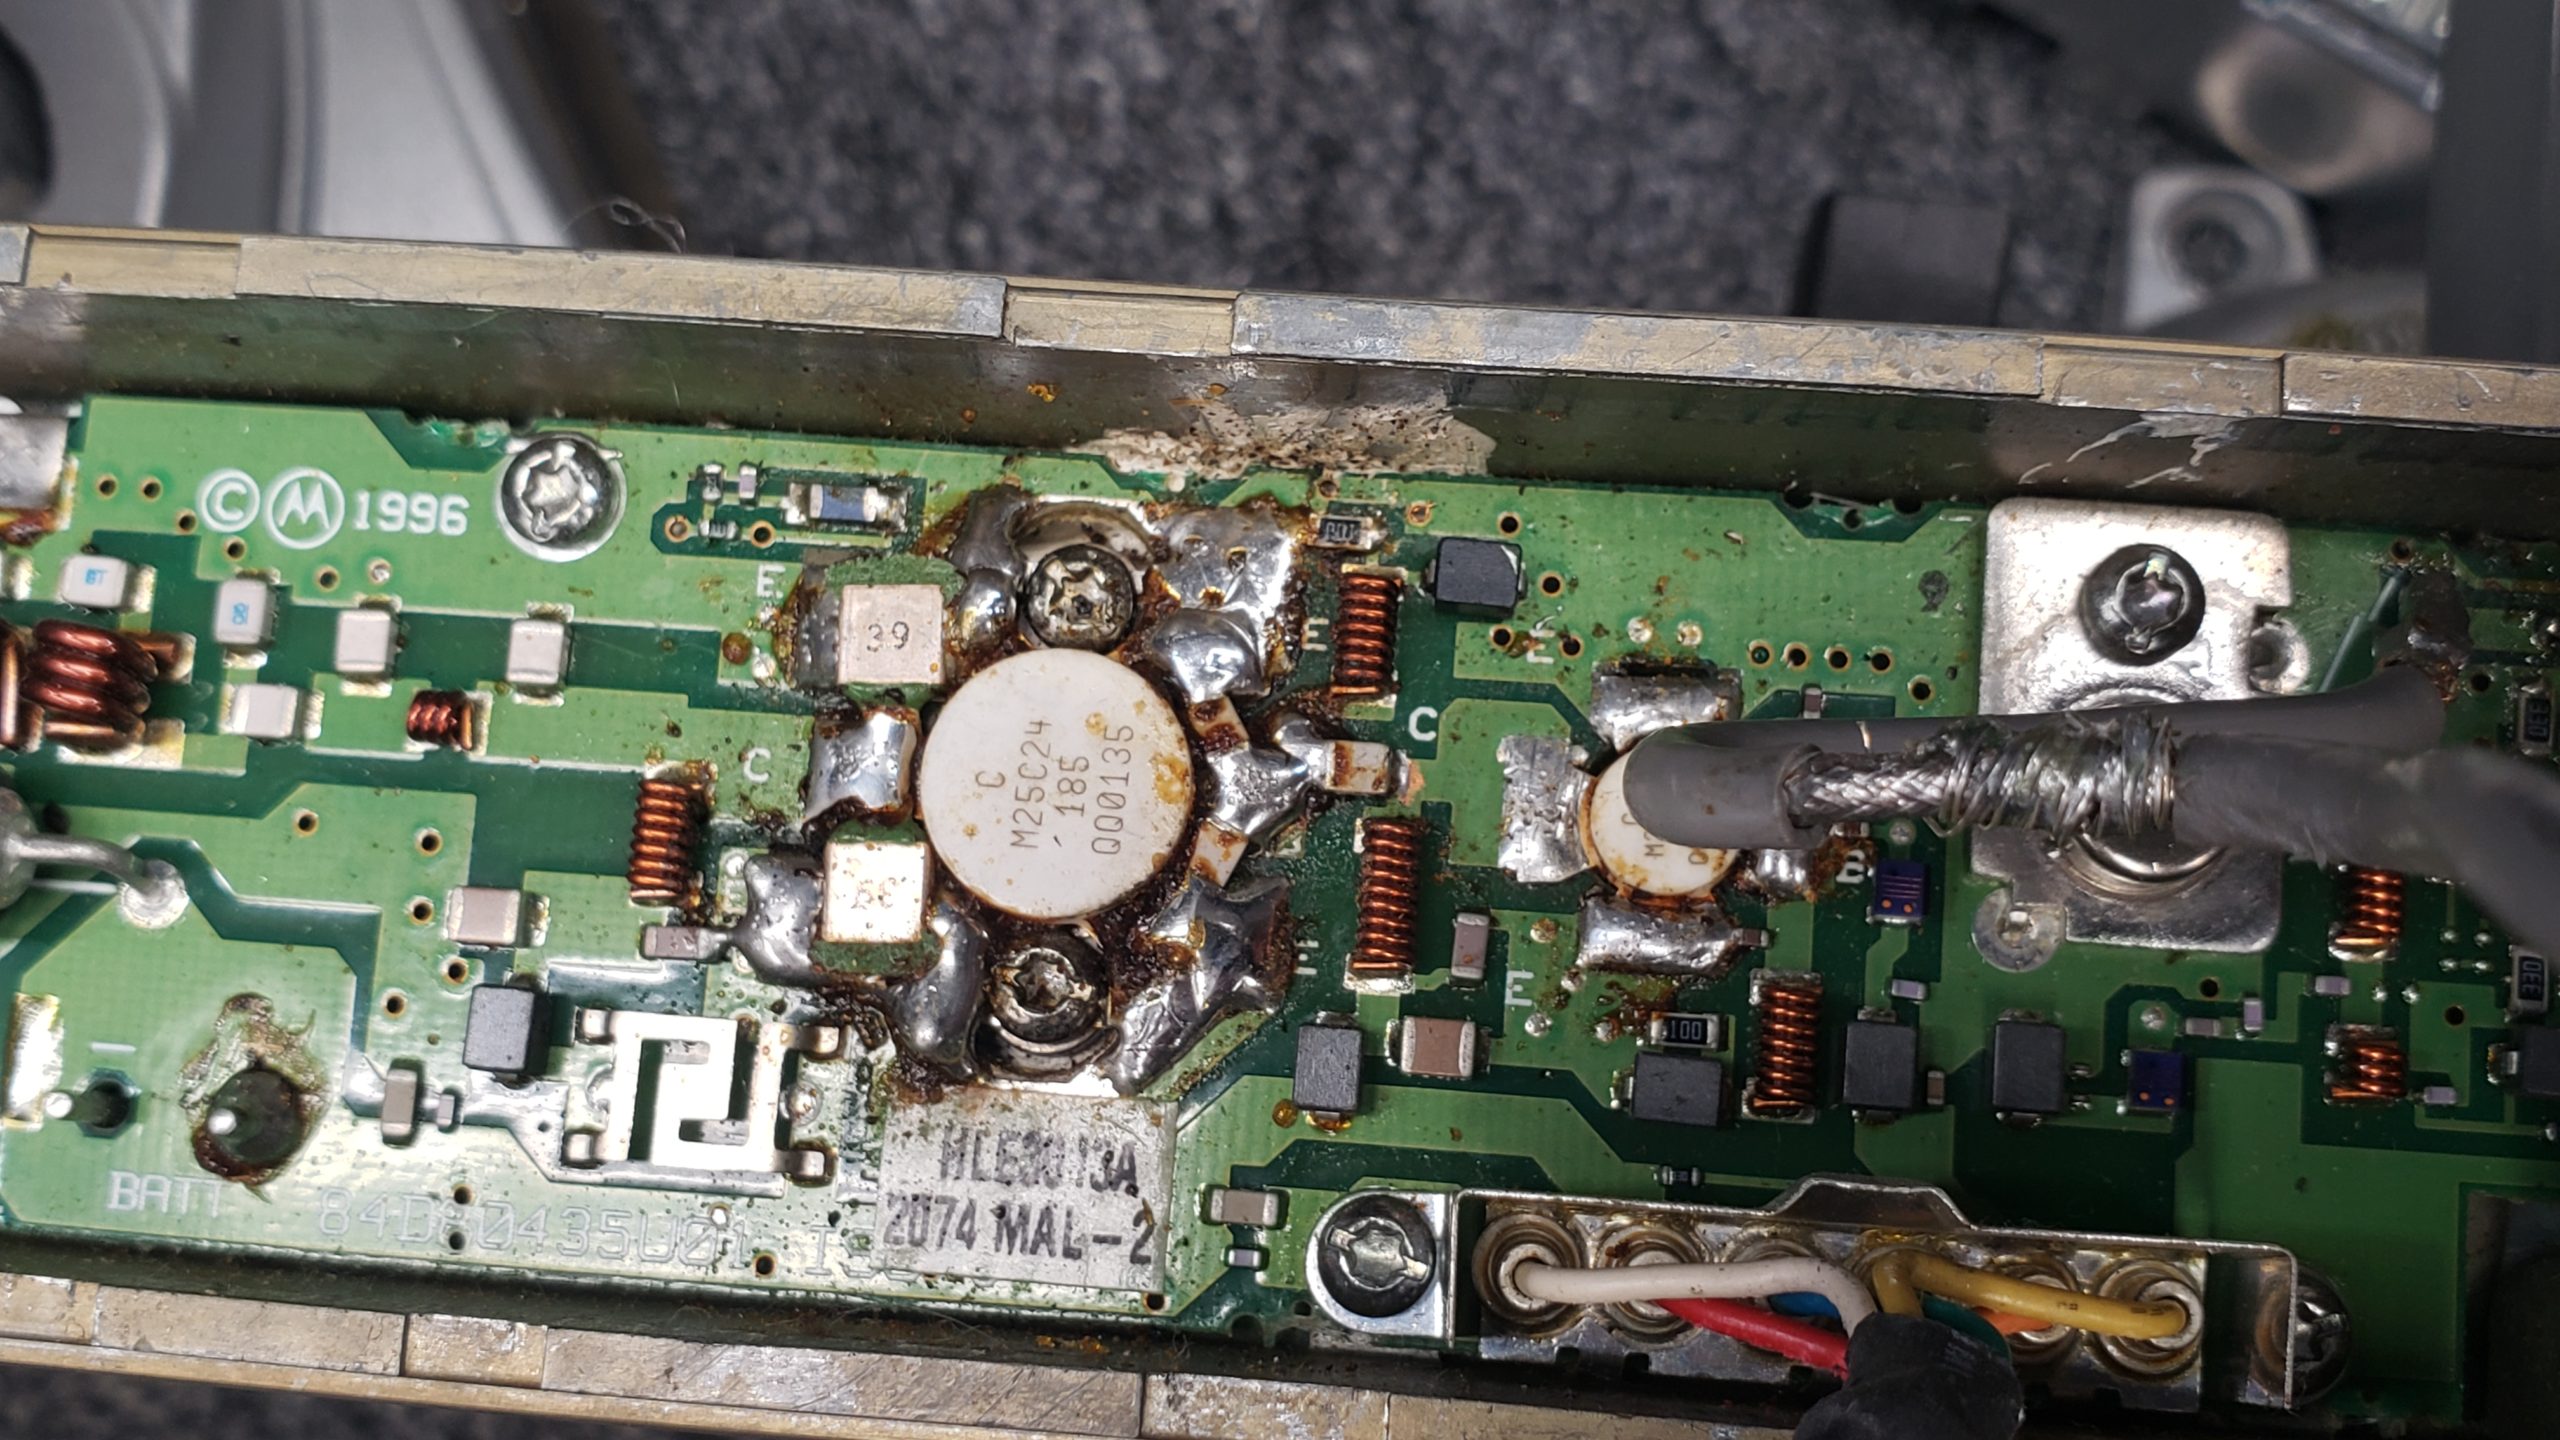
During our last S4S (Saturday 4PM Social) session, there was some discussion about this amplifier by Rod, WD7RW. Rod asked me to look at it due to the fact it had no output. As you can see, from the picture above, several of the devices have been replaced. As you might have already noticed, there is a large amount of thermal paste that has squished out from under the device. This is never a good sign as it generally means that there was too much thermal pasted used during the previous replacement.

Connecting power to the radio and amplifier, I verified I had B+ and ground in the proper locations. During transmit, I verified bias voltage to first stage and gain in the following stages. All ok except the final stage had no output.
One interesting thing I noticed was that during transmit, the radio would key, I would see the TX light come on and stay on, there was about 4 amps of supply current for a few seconds then the current would drop off even though the TX light stayed illuminated. This was due to the fact there is a logic circuit in the radio, that protects the amplifier from over current and this circuit was being activated.
Checking the surrounding components for short/open conditions and finding none, I decided it was time to remove the final transistor. While doing so, I noticed the lower mounting screw was loose and would not tighten up. Another indication that there was too much thermal paste used. Often, the paste will get into the bind holes and “hydraulic” the threads out when the screw is tightened.

Here the old device has been removed, the PCB cleaned of thermal paste and flux. The transistor is ready for install. As previously noted, the threads were stripped in the lower hole but I was able to find some slightly longer screws that would capture the threads toward the bottom of the hole.

The new device installed, the board all cleaned and ready to test.

Hooked up to a watt meter and powered up.

We have power!

Output on the spectrum analyzer.
